Sunday, March 19, 2023

100% Happy Birthday

Happy Sunday friends.  I have another birthday card to show you today.  This one I made using Pinkfresh Magnolia Pattern stamp and stencil set.  I'm really loving these sets that have a stencil.  Makes cards faster and easier to complete. 

Once I completed the ink blending on the background,  I just the ran the ink pads across a piece of scrap white cardstock  until I had a solid strip.  I let it dry completely then cut it down to about ¼inch.
 
I then inked up The Greetery Everyday Labels and used the coordinating die to cut it out.  I the used foam tape to add dimension.  I finished the card off by adding some jewels in purple tones.
Thanks for stopping by. 
Until next time - Jackie ❤️

Friday, March 17, 2023

Monster Birthday

 Hello there my friends!  It's been a while since I've posted.  I've been creating, but I just haven't taken the time to take pictures of my cards.

Over the next few days, I'll be back with more.  So stay tuned.

Todays card features Ink Blot Shop stamps.  I used the String It Out for the background.  I don't recall which ink I used.  It was most likely Altenew Ruby Red.  Then I stamped Party Monster with MakerForte Eclipse black ink and colored it in with Copic markers.


Thanks for stopping by.

Until next time - Jackie❤️


Friday, January 27, 2023

Birthday card stash

 Good morning crafty friends. It's a beautiful, chilly morning here in Texas.  What winter is supposed to be.  Lately it's been close to summer weather with temps up in the 80's.  But I'm happy for the change.

Earlier in the week, we had storms roll through.  It was a pj, stay at home, kinda day.  Perfect for working on card.  It felt so good to get crafty again.  


I've been wanting to try making an easel card.  This set from Mama Elephant was perfect to try it with.

To make the easel, I just got a horizontal A2 size card and scored it about 1½ from the bottom and folded along the score line and glued on the stamped image.  I then added a strip of striped cardstock on the inside.  This will hold the easel open.
Easy Peasy!

Cherylespiecreates shared partial die cut card that was just gorgeous.  Gave me the inspiration to try it myself.  
I placed the SSS Poppy Field die on an A2 card base.  I ran it through my Platinum 6 making sure the plates stopped right at the edge of the score line.  Perfect cut!
This is where I had the issue.  I thought that I had placed the stamp perfectly within the cut shape, but I didn't.  It was just a fraction off.  Enough that it bothered me.  So I just stamped and cut the image form a piece of cardstock.  After I had finished coloring it,  glued it over top the previously cut card base.  I was going to make it 2 layers anyways.  I don't like that you can see the Copic markers bleed through the paper.  I just did it backwards.  

That's all for today folks.

Until next time - Jackie❤️

Sunday, January 22, 2023

Happy New Year

I've been in suck a funk lately.  Absolutely no motivation to create.  Thankfully, this weekend the creativity was really flowing.
I had a lot of stamped images stored away for another day, including these fun gnomes from MFT. 
It all started with the LOVE die. I had eyed it for a while, a finally bought it on my last shopping spree.
I cut a piece MFT Shiny silver cardstock down and cut the LOVE out 
For the first card, I cut strips of pink and blue cardstock and glued them down to horizontal A2 card.  Then placed the negative die-cut over the top.
The second card I cut the die 2 more time out of white cardstock and glued them all together for dimension.  I used the negative as a template and glues it down.  
I colored the gnomes using copic markers in pink (RVs)  and blue (Bs) and fussy cut them out.
Hopefully, I can keep this mojo going strong.   I felt so good to create

Wednesday, December 21, 2022

Merry Christmas and Happy New Year!!

I'm sure we all feel the same.  December is absolutely crazy.  The first 10 days are taken up with our golf tournament.  Then I always feel rushed to get back and finish my shopping and get my cards made.  This year was just so different.  I don't feel that panic that I normally do.  You know, the feeling that you're forgetting something or someone. I feel so much more relaxed.

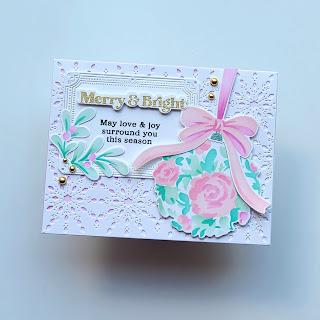
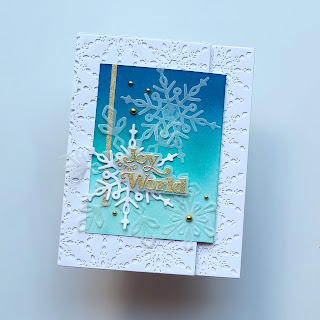
These are few Christmas cards that I made.  I took the Pink Fresh Create and Connect class in October so the first few are from it.  The first 2 card are the ones I ended up sending out this year.  I've gotten so many compliments  on it.


MFT for the win with these adorable personalized gift tags.


These last 2 are my DT posts for Maker Forte.


If you have any questions about any of these cards, please leave me a comment.

Until next time - Merry Christmas - Jackie 🎄


Tuesday, November 29, 2022

Holiday takeover

 I'm desperately behind on my Christmas cards.  I've got a few cards and tags that I've made over the last few weeks for MarkerForte, but have just forgotten to share.  


For details on how I made these, check out my post on the MakerForte blog.


Saturday, October 8, 2022

Maker Forte - Picket Fence IG Hop

 As promised, here are details on the three cards I made for the IG Hop.  All three cards use the same stencil - Snowflake Trio, and sentiments from the stamp set Holly Berries: by MakerForte


This is a simple design.  I centered the snowflake on the card front.  With Eclipse Black ink, I very lightly blended over the design.  I then took another Picker Fence brush and used Versa Mark ink to cover the center of the snowflake.  I removed the stencil and added Asteroid Interference Kaleidoscope Powder.  It just gives it that little bit of shine.
I stamped the sentiment and dusted it with the same Keleidoscope powder and fussy cut it out.  Popping it with foam tape

Using a different snowflake from the stencil, I ink blended using Palm Tree ink. 


Think this is my favorite of the tree.  I used Vegas strip first to show the snowflakes.  Then I went back over the edges with Eclipse black.  

I added a couple drops of water to the Kaleidoscope powder and sprinkled it over the panel.

Adding the sentiment to finish off the card


Thanks for stopping by 
Until next time - Jackie ❤